Baked Macaroni and Cheese


Is it just me just me, or is macaroni and cheese one of the ultimate comfort foods?  Maybe it's because there's no getting around my love affair with cheese.  Or maybe it's because I grew up going to "covered dish suppers" at church where casseroles (along the lines of baked macaroni and cheese) abounded. Or maybe it's because I honestly don't ever remember a time when this


photo from here

was in our pantry growing up.  Which means we got the real thing.  Because my grandmother, and thus my mother, were "organic" way before it was cool, we rarely got things out of a box.  Now I would kill to know I always had a homecooked, "real" food waiting for me on the table every night. Why is it that I wanted things out of a box? I was always so jealous when my friends brought this to school:

photo from here


Ummm.  Gross.  I guess it's true that we don't appreciate what we have until it's gone. It makes me laugh to think about the battles I'll probably fight with my (as of now unborn) children over what they take to school for lunch. It probably makes my mother laugh even harder since she's paid her dues and her battles are fought. And she won.

But don't fret. You can have your comfort food.  Right here in the form of baked macaroni and cheese. So yummy.  Even though my mother isn't in my home cooking for me every night, anymore, I try to channel her every now and then. So here is a real, home cooked, casserole you might find at a good old fashioned southern covered dish supper.

Caveat: this recipe is a little bit high maintenance with all the "stir constantly," but it's worth it.  Especially because you can double or triple it and freeze it for later.  See note below.

Ingredients

1 (8 ounce) package whole wheat macaroni
3 tablespoons butter
4 tablespoons whole wheat flour
1 teaspoon dry mustard (optional, for a little extra flavor)
1/2 teaspoon salt
black pepper, to taste
1 cup milk
1 cup cream
2 cups sharp cheddar cheese, shredded
1/2 cup breadcrumbs, buttered (optional)

Directions

Preheat oven to 400°F.

Cook and drain macaroni according to package directions; set aside.  In a separate bowl, mix flour, dry mustard (if using), salt, and pepper. In a large saucepan, melt butter. When melted, add the flour mixture, using a whisk to stir until well blended.


Pour milk and cream in gradually; stirring constantly. Bring to a boil and boil 2 minutes, stirring constantly.


Reduce heat and cook, stirring constantly, for 10 minutes.  (Mixture will get noticeably thicker, as you can see below).


Gradually add shredded cheese and simmer an additional 5 minutes, or until cheese melts. Remove from heat. Add macaroni to the saucepan and stir to combine. * Transfer macaroni to a buttered baking dish.  Sprinkle with breadcrumbs, if desired.


As an aside, I topped only half the dish with breadcrumbs.  While I don't necessarily count calories, this recipe seemed rich enough to me to leave the breadcrumbs off.  The hubs, however, always seems to be trying to gain weight (I know, I want to kill him, too) so I figured he would enjoy the extra richness.  I tasted a bite with the breadcrumbs (for reference, obviously).  Don't get me wrong.  It was pretty delicious.  But I didn't miss them on the part I ate without them.

Bake 20 minutes until the top is golden brown.


*Note: You can also freeze this for later use. Once you've mixed the noodles with the cheese sauce allow it to cool to room temperature. Then transfer to a container for freezing. When you're ready to cook it, let it thaw and come to room temperature. Then transfer to a buttered baking dish, sprinkle with bread crumbs and then bake for 20 to 30 minutes, until golden brown on top and bubbling.


(Recipe adapted from Fannie Farmer's baked macaroni and cheese found on www.food.com).


Pecan Honey (Breakfast) Cookies

I've mentioned my love of breakfast foods, and I don't really know why I love it so much, but I do.  I found this recipe on this blog and thought I would try it because it said breakfast and cookie in the same sentence so it had to be good.  The original recipe called for maple syrup but I've found that I like maple syrup on pancakes and pancakes only.  Maple syrup as a sweetener doesn't do anything for me.  So I used honey instead of maple syrup.  You'll notice that I put breakfast in parenthesis.  They are, in fact, perfect to grab a couple for when you need to eat breakfast on the go (in which case, maple syrup would probably be good...there's just something about maple syrup, to me, that needs to stick to breakfast and not cross over into the general sweetener category) but I think the cookies are good enough to eat as a treat throughout the day.  They're not sweet sweet, so don't be expecting a sweet treat.  But they're still a cookie with a twinge of sweetness.  Enough to satisfy you.  Unless you're in the middle of a chocolate attack.  Because let's be honest, sometimes there's just nothing better than this:

photo from here

Mmmmmmm.  The darker the better.  But I digress.  If you haven't seen www.100daysofrealfood.com you should probably check it out.  A girl in North Carolina, wife and mother of two, challenged herself to cut out processed foods for 100 days.  Not only that, she challenged her family to the same thing.  (Ok, let's be honest, her children probably ate whatever was served to them, but it was proably daunting to think about cooking for two children without any processed foods).  She succeeded in completing her challenge, and as you might guess, there was no turning back.  Her blog is a great resource for those of you new to the real foods diet and to those of us not so new to it.  


Ingredients


1 cup whole wheat flour
¾ cup rolled oats  (not instant)
½ teaspoon baking soda
¼ teaspoon salt
¼ cup applesauce
3 tablespoons honey
2 tablespoons butter, softened
1 pastured egg
½ teaspoon vanilla
½ cup chopped pecans


Optional Ingredients (neither of which I used, but both of which I think would be good)
chocolate chips
dried fruit

Directions

Preheat oven to 375 and grease a cookie sheet.  Whisk together the flour, oats, baking soda, and salt. 


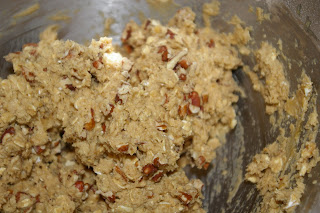
In a separate bowl beat the applesauce, maple syrup, butter, egg, and vanilla.  While beating the mixture on a low speed add the dry ingredients until well blended. 


Fold in the nuts with a spatula.  (This would also be the time to fold in any "optional ingredients" you choose to add).


Drop onto prepared cookie sheet with a spoon.  


Bake for 8 – 9 minutes or until they start to brown.  Store in air-tight container.


Swiss Chard Squares

A pictorial guide to why I love the farmers' market:


Y'all.  Those are red onions.  I'm clearly a city girl because I never knew red onions had stalks like that.  I fell in love with them when I saw them.  If for no other reason than that they are so beautiful.  Because they are.  I left them out on my counter on purpose, and despite the clutter, just so I could look a them.

And don't forget about this:


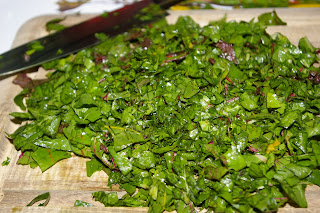
That is swiss chard.  Again, city girl.  I had never heard of swiss chard, much less cooked with it, but that's why I love a farmers' market and being a part of a CSA.  Each week I get a basket of local produce.  I never know what's coming but I can always be sure it's fresh and local and I can trust where it came from.  Lately we've been getting a lot of swiss chard.  For a few weeks I just steamed it with some garlic and onion, and it was good, but I was pretty excited when my CSA came with a recipe for Swiss Chard Squares.  They're similar to quiche.  But not.  We ate them for breakfast one morning and then again as the bread to go along with our meatloaf.  So they're versatile.  For those of you party planners (or baby shower planners if, like me, all of your friends seem to be expecting!) these would be perfect cut into small pieces in lieu of baby quiches. 

Ingredients

3 pastured eggs
1 cup whole milk
1/2 cup whole wheat pastry flour
1/2 cup whole wheat flour (or white whole wheat flour)
1 teaspoon aluminum-free baking powder
2 1/2 cups shredded cheese (I used swiss)
2 1/2 cups chopped swiss chard


1-2 minced garlic scapes (or minced garlic)*


Directions

Preheat oven to 350.  Mix together eggs, milk, flours, and baking powder.  Add cheese, swiss chard, and garlic scapes and stir together. 


Press mixture into a greased 8 x 8 inch baking dish.  Bake about 30 - 35 minutes, until toothpick inserted comes out clean.  Serve warm or cold!


*City girl farm lesson of the day: Garlic grows underground and has a bulb. much like an onion.  Garlic bulbs, wanting to become garlic plants, grow hard and eventually shoot green things that are long and thing (again, much like an onion) up through the ground.  These green things are garlic scapes and they taste like a cross between garlic and an onion.  Someone at your local farmers' market shoudl have garlic scapes, but if you can't find garlic scapes, plain minced garlic will do in this recipe. 

Berry Sauce


Pictured above: berry sauce stirred into goat's milk kefir

I often eat yogurt and fruit for breakfast.  It's quick, easy to carry if I'm on the go, and healthy.  So when I saw this recipe, I knew I had to try it.  This berry sauce gives yogurt and fruit a little twist and serves to make flavored yogurt.   No more gross fruit on the bottom!  You could do yogurt with this berry sauce and nuts on top.  Or you could mix the sauce with kefir and put it over granola.  The berry sauce would also be good on top of pancakes or waffles.  Even ice cream if you need a sweet treat.  Just make sure you're eating an all-natural ice cream.  The recipe comes from another blog, and as that blogger pointed out, this sauce is a great alternative to this:


Hershey's "Strawberry Syrup."  Gross.  Ok, so I've actually never had that syrup but I think it sounds pretty gross.  Children, though, have gross taste buds.  So for those of you with children, this might be right up their alley. 

This recipe is simple.  Just three ingredients.  And it takes no more than 10 minutes to prepare.  It doesn't make a big batch, but the flavor is strong enough that you don't need more than a few teaspoons. 

Ingredients

3/4 cup frozen berries
2 tablespoons honey
1/4 cup water


Directions

Combine all ingredients in a small saucepan over medium-low heat. 


Bring to a light simmer. Cook until the berries have softened, about 5 – 10 minutes. Remove from heat and puree with hand immersion blender or countertop blender.  Use immediately or store in airtight container in refrigerator.

Note: The berries I used were raspberries and blackberries so after I blended the mixture, I strained it using a fine-mesh strainer to get rid of the seeds.  That step is optional and up to your taste preferences.  


(Recipe from www.100daysofrealfood.com)