Lime cream cake


I've had many a pinterest fail.  Not necessarily fails because I couldn't do something (although I keep things pretty simple when it comes to what I pin so don't be too impressed) but because things just don't taste as good as they look on pinterest.  

This dessert isn't one of them.  It is really good.  Good enough that the hubs got into it one night after I went to bed.  It's almost like a key lime pie, except it's denser.  I preferred it frozen but a little thawed so I kept it in the freezer and took it out about thirty minutes before I wanted to eat some.    

I actually made a small batch this first time (why waste all those cashews if it wasn't going to be good!) but the next time I make it, I'll make a full batch.  It's a good healthy dessert to have on hand to satisfy your sweet tooth.  Also, I added more lime juice than the recipe calls for because I prefer a limier (is that a word?) taste, but of course do that according to your own taste buds.  Enjoy!

Ingredients

Crust:
 1 cup almond meal (basically almond flower - it can be found at Trader Joe's for cheap enough that it's worth buying instead of making.  If you don't have a trader Joe's, I'd probably make your own in a food processor because it's more expensive at Whole Foods, etc).
 3-4 medjool dates (or 1-3 tablespoons maple syrup - I used dates)


Filling:
2 1/3 cup macadamia nuts or cashews, or a combo of the two nuts, soaked in water for several hours if not overnight
1/2 cup coconut oil
1/2 cup honey or maple syrup
1/3 cup fresh lime juice
about 2-3 tablespoons lime zest (about 6-8 limes)
1/4 cup water

Directions

Place almond meal and dates into a food processor and pulse till combined. Spoon crust into a pie pan and press into the pan. Set aside.


Place nuts, honey, lime juice, lime zest and water into blender. Blend for a little bit and then add coconut oil. Continue to blend until everything is well blended and the batter is smooth. Adjust lime taste to your liking and add more or less juice or zest.

Spoon lime filling on top of the crust.


Place in freezer and let set for a few hours.  Remove from freezer and keep in refrigerator until ready to enjoy (or keep in the freezer and remove thirty minutes before eating).


Original recipe here

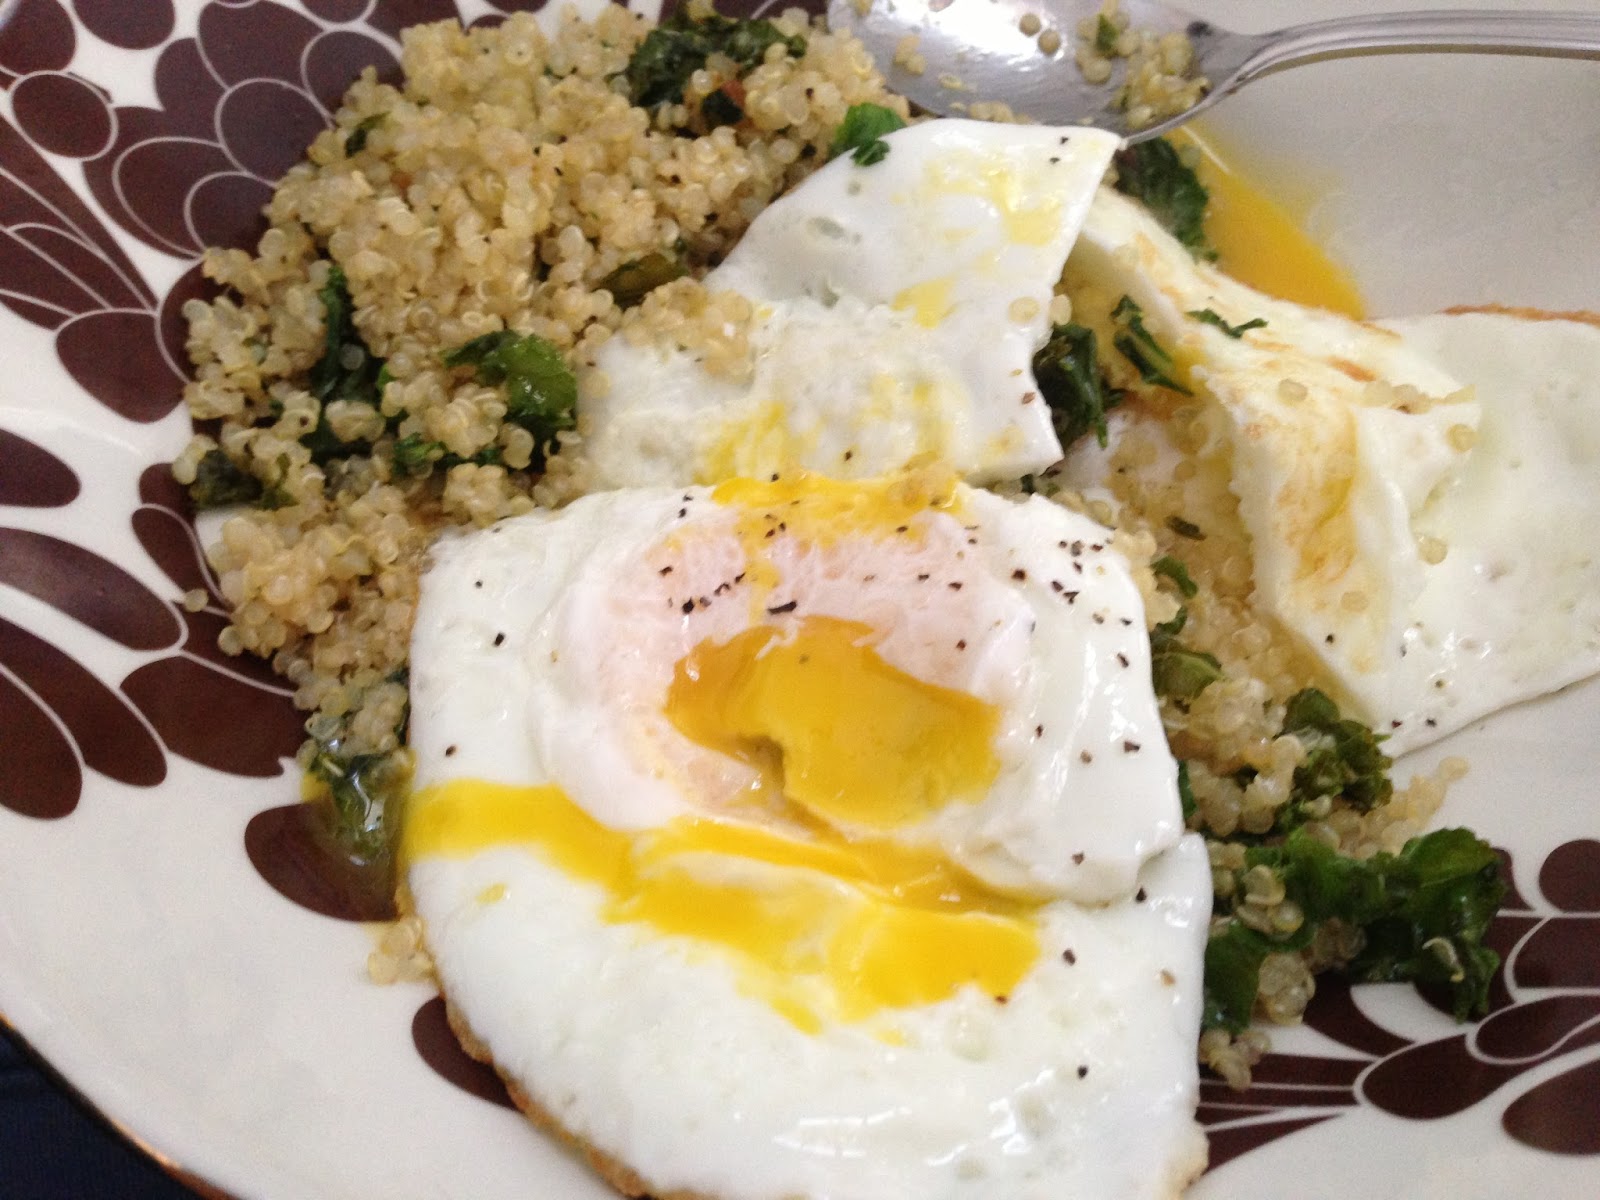
Savory Kale and Quinoa (with egg)


Have you seen Gwyneth's new cookbook "It's all Good"?  (Also, did you know that periods always go inside quotation marks but question marks only go inside the question mark if it was originally part of what is being put in quotation marks, i.e. a question?)  It's an aptly named cookbook since it is, in fact, all good.  Including this kale and quinoa breakfast dish (which I sometimes eat for dinner as well).  
Turns out quinoa is basically a perfect grain.  So perfect, in fact, that the hubs and I can eat it on our grain-free diet.  It's gluten free and is a complete protein on its own.  High in calcium, antioxidants and anti-inflammatory nutrients.  One would think that such a highly nutritious food would not taste good. One would be wrong.  Do yourself a favor and test me on that.
Ingredients
2 tablespoons ecoconut oil
1 garlic clove, finely chopped
2 large leaves of kale (stems discarded), finely chopped
1 cup of quinoa
1 Fried or Poached Egg (I prefer fried (fry in a pan with about 1 tsp of oil) and runny)
1 scallion, white and light green parts only, very finely sliced
2 cups water
Salt and pepper
Directions
Rinse the quinoa thoroughly and place it in a pot set over high heat with the water and a pinch of salt. Bring the quinoa to a boil, lower the heat, cover the pot, and cook until all the liquid is absorbed, about 12 to 15 minutes. Remove from heat.
Heat the oil and garlic over medium heat in a small skillet until the garlic begins to soften, about 1 minute. Add the shredded kale and cook, stirring now and then, until the kale is wilted, 2 to 3 minutes. Add the quinoa and cook, stirring until warmed through, another 2 minutes. 


Season the mixture to taste with salt and pepper. Place the mixture in a shallow bowl or on a plate, top with the egg, and sprinkle with the scallions. Add a final grind of black pepper if you like.  And then dig in and enjoy.

Recipe from here

Mexican Haystacks


I blame pinterest for the reason I was absent from the world of Snacks and Desserts for so long.  It's so easy to pin recipes onto my "Delish (recipes to try)" board and then go back to that board over and over, both for the tried and true recipes and the new ones I plan to try.  This recipe is one of the first pinterest recipes I tried.  It is so so good.  Pretty (impressive even) presentation and yet very easy.  And delish.  Next time you get a hankering for greasy mexican food, do yourself a favor and make this recipe instead.  Fresh, healthy, and delicious so no food hangover the next day.

The original recipe calls for rice but the hubs and I can't agree on the kind of rice we eat.  I say we're a brown rice family.  He doesn't like brown rice and insists we're a white rice family.  I can't make myself eat white rice because it's refined, processed, generally unhealthy (sorry y'all!) so we compromised and we're pretty much a quinoa family.  Don't worry, though, quinoa and rice are pretty much interchangeable without sacrificing any flavor, and this recipe is no exception. Whether you go with brown rice or quinoa, you can't go wrong (just don't go with white rice!).

Ingredients

Rice:
2 cups uncooked brown rice (or quinoa)
1 bunch fresh cilantro (dried is fine, too)

Meat:
1 1/2 lbs ground beef
1 onion, chopped
2 - 4 cloves fresh garlic
salt & pepper to taste
4 cups organic salsa

Toppings (note: you can really use whatever toppings you like):
1-2 avocados, chopped
1-2 red peppers, chopped
1-2 ripe mangoes, chopped
fresh cilantro for garnish


Directions

Start your brown rice (or quinoa) in a pot on the stove. Next, add ground beef and chopped onion to a large saute pan. Add garlic powder and salt and pepper. When the meat is browned, add 4 cups of salsa. Bring the salsa to a boil and then reduce the heat to a simmer. Cover and simmer for about 20 minutes. In the meantime, chop the cilantro, pepper, avocado, and mango. When the rice (or quinoa) is done, stir in almost all of the fresh cilantro, leaving just enough to garnish each dish. 


Find a small bowl or ramekin and put the rice (or quinoa) in there, pressing it down with the back of a spoon.  Turn the bow over to empty the rice (or quinoa) on a plate.  It should slide out pretty easily and maintain the form of the bowl you used.  Top with meat and other toppings.

Or if you're in a hurry and/or don't care about the presentation, you can just throw it all into a blow like this:


Since regardless of how you serve it, it's probably going to end up looking like this:


Summer Squash Saute

The hubs and I are on a new restricted diet to help treat his candida (too much yeast in his body) and his ulcerative colitis.  Bless his heart.  I actually don't mind as it's a good excuse for me to detox and get to a good baseline again.  As you might know, it takes time and effort to stay committed to a non-processed diet, and with the busyness of spring and summer (not to mention the perfect sitting outside weather that spring brings) processed foods crept back into my diet more than I would have liked.  Never fear, though - the hubs' candida and UC have us back on the right track!  Have I said bless his heart yet, because bless it indeed.  

What exactly is restricted on this diet, you ask?  Well, a lot.  No grains (except quinoa, flax seed, and millet), no fruit except berries, no soy, no cow's dairy, no sugar (even natural sugar like honey) etc.  What can we eat?  Meat (good thing - I don't think I could convince the hubs to go vegetarian), eggs, vegetables, berries, raw nuts.  I mean, that's not all we can eat, but the point is that it's pretty restricted.  

The moral of my story?  I love recipes like that are all-around good for everyone.  Even people who are on really restricted diets.  Do yourself a favor and if you don't have a garden, go to a farmers market and get local squash and zucchini for this recipe.  Amahzing.


Ingredients 

2   lb. summer squash and/or zucchini, cut into matchsticks
1   tsp. kosher salt plus more to taste
¼   cup sliced raw almonds
2   tbsp. coconut oil (or olive oil, but coconut is my preferred oil for cooking because of it's high       smoke point)
2   garlic cloves, sliced
½   tsp. crushed red pepper flakes (or less if you don't like spicy)
¼   cup finely-grated Parmesan (the hubs and I can't have this part so I'll look for a hard goat's       cheese next time I make it)
Freshly ground black pepper

Directions

Place squash/zucchini in a colander set in the sink or over a large bowl and toss with 1 tsp. salt.  Let stand 10 minutes, then squeeze well to remove as much excess moisture as possible.  (Do not rinse.)

Meanwhile, toast almonds in a large dry skillet over medium heat, tossing occasionally, until lightly browned, about 3 minutes.  Transfer to a plate; let cool.

Heat oil in same skillet over medium heat.  Add garlic and red pepper flakes and cook, stirring often, until fragrant but not browned, about 2 minutes.  Add squash and cook, tossing occasionally, until crisp-tender, about 5 minutes.  Fold in Parmesan (or goat's cheese) and season with salt and pepper.  Fold in almonds.


Raw Brownies


Birthday monster.  Noun.  A person who celebrates his or her birthday to the fullest extent possible, using every possible excuse to create a celebration of the day.

I actually hadn't ever heard that description for someone like me until this past Friday (which, coincidentally, was my birthday) when I had a quick email exchange with a work friend that went something like this.

Birthday coffee?

Duh.

The email exchange was followed by a trip to Starbucks (no guilt for getting a latte on my birthday after all) where I proceeded to tell all the employees it was my birthday.  On the way back to the office he commented that I was "one of those birthday monsters."  (See above definition).

I am most definitely a birthday monster, which I explained here.  And this year was no exception, even if the weather did rain for 48 hours straight.  On Sunday we went to my parents' house for a family birthday lunch and my mother made the best shrimp and grits ever and not one but TWO desserts.  Naturally, since I was the birthday girl, I partook in a little bit of both.  


So today I'm cleansing (more on that later) but oh my word was it ever worth it.  

These raw brownies might not look like much:


But do yourself a favor and make a batch pronto.  You won't regret it.  The primary sweetening agent is dates so it's like a chocolate larabar, which means it's virtually guilt free.  And the best part is that they're super easy so you don't have to wait for your birthday for an excuse to labor over them.  Whip them right up and be on your merry way, doing your best not to eat the whole pan in one sitting.

Ingredients

1 cup pecans (you can use walnuts in a pinch)
1 cup dates
5 tablespoons raw cacao (cocoa) powder
4 tablespoons shredded unsweetened coconut
2 tablespoons hone
1/4 teaspoon sea salt

Directions

Place pecans in your food processor and process until they become small and crumbly.  Add dates and process again until the mixture sticks together and the dates are well processed.  Add the remaining ingredients and process again until the mixture turns a dark chocolatey brown. Stop processing before it gets too buttery. (There should still be air between the small bits so that you will be able to press them down into your brownie pan.)  Dump the mixture into a brownie dish or small cake pan and press down firmly using your clean hands.

Refrigerate this raw brownie recipe for a couple of hours. If you can't wait, you don't have to refrigerate it, but it's easier to slice when chilled.  Store in the refrigerator (if you don't eat it all in one sitting!)


Brussels Sprouts with polenta and eggs

Y'all.  I'm back.  I know, I know.  It's been OVER A YEAR.  Too long.  What has kept me so busy?  Well, I got a new job (ok, ok, not so new anymore since I've been here for over a year) that I LOVE.  Between working full time and teaching yoga and taking care of my two precious angels of dogs and helping with my local farmers market and the missions committee at my church, well, I'm a bit busy.  But at long last...I'm back in the game.


Please tell me y'all can name (and love) that movie!

So to celebrate my return I thought I'd start with a little comfort food.  Comfort food is the best.  One of my favorite comfort foods is breakfast for supper.  Brupper if you will.  But let's be honest, there are only so many ways to eat eggs and bacon before you get burned out.  Enter this recipe.  It's a twist on breakfast in that it's polenta (side bar: my husband says polenta is the rich man's grits and I think he might be right because they taste the same to me.  Except I don't think cornmeal is any more expensive than grits.) and brussels sprouts.  So it's a good way to add vegetables to your brupper, which I've always struggled with.


Yummy delish.

Ingredients

1 cup Brussels sprouts (halved if you're inclined)
2 teaspoons olive oil
1 clove garlic, smashed
White or yellow cornmeal
2 eggs, fried
2 slices of bacon
Salt and pepper to taste

Directions

Drizzle Brussels sprouts with olive oil garlic. Cook at 350 for 20 mins.  

While Brussels sprouts are roasting, prepare polenta.  (I'd recommend diving her recipe by two or even three.)

Serve cooked polenta in a bowl and top with one egg.  Crumble one slice of bacon on top. 


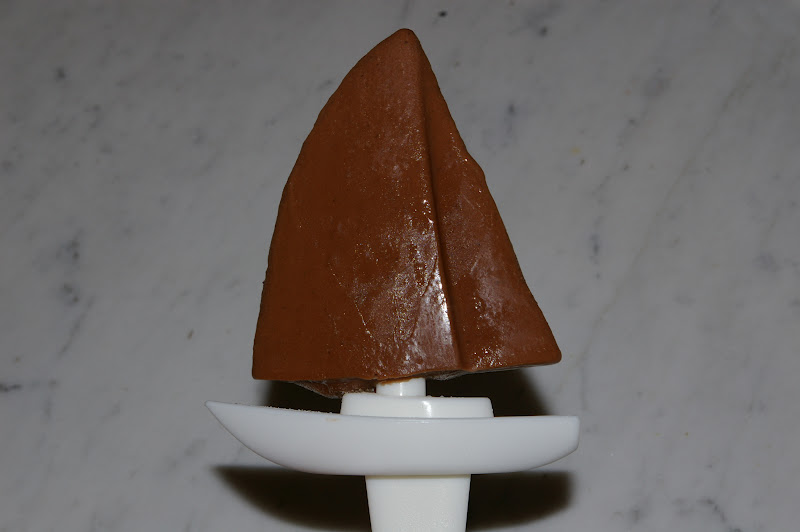
Fudgesicles

Is it just me or is a fudgesicle universally loved?  They're great for children* and adults alike.  They remind us of the pictures we all have from our childhood that looks something like this:


Yes, that's me.  I'm not ashamed to admit that
I was the #cutestchildever
And if you're the hubs you have picture like this from your adulthood:

Hubs really likes these fudgesicles

Fudgesicles are the perfect combination of chocolate and ice cream, right?  What's not to love?  Um, sugar.  I used to eat fudgesicles every night when I was on the many diets I tried.  They were the perfect guilt-free dessert.  Or so I thought.  I'm not saying you should feel guilty if you occasionally splurge on something with sugar on it.  But thanks to this recipe, fudgesicles don't have to be one of them. 

I love this recipe.  I love chocolate.  I love ice cream.  I almost always eat a dessert of some sort at night.  And now fudgesicles are in the rotation.  Guilt free fudgesicles.  Lest you think guilt-free = gross, I offer the previous photograph of the hubs into evidence.  He likes these fudgesicles.  Do you?

*With school starting back up, these fudgesicles are the perfect after-school snack.  And I won't even tell your children it was my idea.  You're welcome.

Ingredients

2 T cocoa powder
1/2 canned coconut milk
2 small, very-ripe bananas
1/16 tsp salt
1/2 tsp pure vanilla extract
optional: you could add a spoonful of peanut butter.  Yum.  Or strawberries.  Or dark chocolate chips.  The options are endless.

Directions

Combine all items in a blender and blend until smooth. Pour into popsicle molds and freeze.  Easy peasy.


Herbed Cream Cheese Cucumber Rounds


Cucumbers + radishes = a food combination I'm sure to hate.


I don't like cucumbers.  I can hardly eat them, actually.  I blame it on an unnamed diet I tried before I learned about the beauty (and health!) of real foods on which cucumbers were a free food.  I could eat as many cucumbers as my heart desired.  And I did.  I'd bite into them like apples. All was well and good until one day I hit my limit.  I didn't see it coming.  There I was, eating my cucumber without a care in the world and then...there it was...nope, one bite too many...I couldn't make myself swallow it...no more cucumbers for me ever again.  


And then there's radishes.  I think we can all agree that radishes are, um, random.  Poor radishes, they get a bad rap.  It's not their fault they're weird.  And kind of spicy.  But not spicy spicy.  They're weird.  Hard to explain.  Beautiful.  But weird.  I used to get them in my CSA and wondered how in the world I would use them because I didn't want them in my salads.  I'm a little bit ashamed to admit I'd just let them go to waste.  Too bad I didn't have this recipe back then because it's not only so pretty but so so delish.  


Cucumbers + radishes (+ herbed cream cheese) = delish.  Who knew??

Ingredients


4 oz. cream cheese, softened
2 tablespoons thinly sliced fresh mint
2 teaspoons finely chopped fresh chives
1/2 teaspoon finely grated fresh lemon zest
1/4 teaspoon fresh lemon juice
1/8 teaspoon table salt
pinch of cayenne, or to taste
1/2 medium seedless cucumber (seedless cucumbers are a bit dry so I might try seeds next time)
3 medium radishes 
tiny mint leaves (if desired, for garnish)
coarse sea salt for sprinkling


Directions


Stir together cream cheese, herbs, zest, lemon juice, table salt, and cayenne.
Slice cucumber in 1/2" thick slices. Trim bottoms from then radishes, then slice into thin (approximately 1/16") slices.  Top each cucumber slice with a radish slice and 1/2 teaspoon herbed cream cheese.  Sprinkle with coarse sea salt, garnish with tiny mint leaves and finely grated lemon zest if desired. Serve immediately.


Recipe from www.epicurious.com

Peppermint Patties


When we were little, we went on lots of trips with our church youth group.  Some of my favorite memories are from the nights before these trips when I would spend the night with my friend, Julie, and we would make mix tapes (that's right...tapes) and her parents would take us to the grocery store to load up on Teen magazine (that's right...Teen magazine, and yes, I think we were about 12) and candy.  Some of my favorite candy was hot tamales (probably because I had a crush on a boy who liked them!) and york peppermint patties (probably because chocolate was maybe my first true love).  They say songs and scents are invoke memories stronger than anything else.  I think food is another one (then again, I love food, as evidenced by my food blog).  For me, peppermint patties do it every time.  If I close my eyes I'm certain I'm on the "people mover" reading Teen magazine and listening to my mix tape.  takes me back to those days of bus trips with my youth group.  Thanks to Chocolate Covered Katie I can still experience the memory.  Thanks Katie!  What about you -- what's your favorite food memory?


Ingredients

2 tsp water
2 tbsp coconut butter or Homemade Coconut Butter
1/8 tsp pure peppermint extract (or as desired)
1 1/2 tsp honey
2 tbsp coconut oil (unrefined)
1/4 cup cocoa powder
2 tsp water
2 tbsp honey


Directions

Combine first 4 ingredients in a small bowl (it is best if the coconut butter is not melted.) In a separate bowl, combine last 4 ingredients. In candy molds or cupcake liners, spread out half of the chocolate, then spoon the mint filling on top.


Cover with the rest of the chocolate and freeze until chilled.


Notes: If you don’t like mint, of course you are free to omit the extract. If you don't have coconut oil, you can substitute melted dark chocolate for the last four ingredients.

Watermelon frosty (or margarita!)

Heads up: watermelon is my very favorite summer fruit. 


I can. not. get enough of it.  The good news is that the hubs' mother knows this about me and every time we visit her in the summer she sends a local watermelon back.  (The visits to the hubs' hometown of Paris (not France) may or may not increase drastically in the summer).  All that to say, I have several watermelon posts planned for the summer so get excited!  The debut watermelon recipe for Snacks and Desserts is this deliciousness. 

I first tried this recipe first, with great success, at a recent FNHH.*  As soon as my friend and I tried this libation, we knew it was a keeper.  The following week we had it again.  And I'm pretty sure we'll have it again this weekend.  In fact, I'm pretty sure it's on the regular FNHH summer rotation.  And by rotation, I mean it's the only drink we'll consume at our summer FNHHs.  Obvs.

*What's FNHH, you ask?  Well my friend and I often abbreviate our words (and yes, I have, in fact, abbreviated words since I was in elementary school, so if People magazine (or whatever magazine it was) calls abbrevs a trend of 2012, I guess that means I am obviously a trendsetter).  Somewhere along the way, these abbrevs my friend and I are so fond of turned into initials instead of short words.  It's a pretty fun, if slightly stressful, game.  You should try it.  In any case, we often have Friday night happy hours at my house with some of our neighbors.  So natch our Friday night happy hour turned into FNHH.  Y'all should join us.  The more the merrier!

Do you have a favorite summer cocktail or frozen beverage? Do tell!


Ingredients

2 1/4 cups frozen watermelon cubes
1/2 cup water
2 Tbsp honey

1 large lemon, squeezed (lime juice also works very well: use 2 limes)
1 fresh banana
optional: tequila (or more water or fruit juice)


Directions

Combine all ingredients into a blender and blend until smooth.  Pour into a glass (or drink directly from the blender -- I won't judge) and enjoy.


Bacon-wrapped Pineapple

The hubs and I had a friend in town this past weekend, and I had already planned to spend the day in the kitchen making several recipes I've been wanting to try.  So my friend was gracious enough to give me her honest opinion about whether or not the respective recipes were blog worthy.  This one, without a doubt, passed the test.  After going on and on about how good it was, she said "Oh shoot, I should have said something really clever or funny so I could get a shout out on the blog."  I told her that was enough to merit a shout out.  Especially because she was, in fact, going on and on.

Lest you think my friend Ann was saying recipes were good just so she could get a shout out on the blog, she did feel free to tell me some recipes weren't blog worthy.  Like the cauliflower pizza crust I tried.  (We ended up agreeing it might be good for something besides pizza crust but it wasn't good enough as is).  More to come on that recipe if I get around to experimenting.  In the meantime, y'all should make this recipe sooner than later.  We had to FORCE ourselves to stop eating these delicious bite sized pieces of pineapple.  Wrapped in bacon.  Thank goodness the hubs wasn't far off and he was more than willing to eat to his heart's content.  My philosophy: the more the eats, the less I eat.  Win win.

Let's be honest, people.  Bacon is one of the best foods. Ever. I have a friend who had sugar coated bacon at her wedding reception. It was ridiculous good.  This recipe isn't quite the same, but the way the sweet from the pineapple mixes with the savory from the bacon is pure genius. 

Ingredients

Fresh pineapple, chopped into bite-sized pieces
Bacon
Honey

Directions

Preheat oven to 375. 

Wrap a wire cooling rack with aluminum foil and place on top of a baking sheet. 

Heat honey over low heat just to get a runnier, less sticky, consistency.  Cut each slice of bacon in half and dredge in the honey.  Run your index finger and thumb down the bacon to remove any excess honey.  (By the time I finished this step, there wasn't much honey left on the bacon, and I'll probably even leave it out completely next time I make these because the pineapple is sweet enough on its own). 

Wrap half a piece of bacon around a piece of pineapple and secure with a toothpick.  Place each piece of bacon-wrapped pineapple on the foil-lined baking pan.


Bake for about 25 minutes or until the bacon looks brown and crispy. You can turn the oven to broil for the last few minutes to get them really crisp.

Remove from oven.  Let cool slightly.  And enjoy. 


Chocolate covered peanut butter banana bites

The name of this recipe is kind of a mouthful.  Which makes sense because I want my mouth full of these delicious little suckers.  Chocolate + peanut butter + banana = Pure deliciousness. 

When we were little, my mother would sometimes make bananas and peanut butter for us.  Well, this is like bananas and peanut butter on steroids.  Dark chocolate steroids.  Dark chocolate makes everything better.  Everything.  And since my mother used to make this recipe (sans chocolate) for our breakfast it makes me feel like leg eating two or three of these for breakfast, which I might or might not have done yesterday.   Turns out, eating these banana bites with a cup of coffee might make them even better.

The original recipe recommends eating these banana bites frozen, but I found that frozen bananas were harder to chew than I like.  So I stuck mine in the refrigerator after they were frozen.  Cold, but not frozen, bananas with peanut butter and chocolate is the Mary Poppins of bite-sized treats.

Ingredients

2 large bananas
1/4 cup all-nat­ural peanut but­ter (or nut butter of your choice)
1/2 cup dark chocolate chips or dark chocolate bar, chopped

2 tbsp - 1/4 cup milk (preferably raw)

Directions

Line a cookie sheet with waxed paper. Slice bananas into slices about 1/2–3/4 inch thick. Spread a dol­lop of nut but­ter on top of each one.


In a small saucepan, combine the chocolate and milk (less is more so start with less and add as needed) and melt until they can be stirred together.  You want a dippable, not spreadable, con­sis­tency.  Add a splash more milk if nec­es­sary.


Dip the banana chunks into the melted chocolate.  Place choco­late coated bananas on the prepared sheet and place in freezer until com­pletely frozen (3–5 hours).


Remove frozen banana chunks from the sheet and store in an air-tight container in the refrigerator (or freezer if you prefer frozen).


Recipe from here

Chicken Spaghetti


This recipe is important to me for two reasons: 

1) Our favorite chicken farmer has had some recent back trouble so he's no longer a vendor at our farmers' market.  Tragic.  Not only did we trust his chicken, but he was the most affordable (chicken) farmer at our farmers' market.  I recently tried to buy some chicken from a different farmer.  Our conversation went something like this:


Me:  Hi, I'd like one pound of boneless chicken breast, please.
Mr. Farmer:  No problem.  (Digs around in his freezer).  Well, looks like I only have 1.1 pounds.
Me: Oh, that's no problem.
Farmer:  Great.  (Does some math).  Ok, that'll be $19.25"
Me:  I'm sorry, I thought you said nineteen dollars and twenty five cents.
Farmer: Oh yea, I did.
Me:  Ummm.  Ok, I'm gonna have to pass.  Thanks anyway.


I shamelessly walked away with my head held high.  Highway robbery, I tell you.  Highway freaking robbery.  The next week I was able to find one pound of chicken for only $9.00.  The $10 difference would have bought me three lattes at Starbucks!  Clearly that farmer is crazy.

2) I just got a new job (hooray!) for a pay cut (boo!) so gone are the days where one chicken breast = one meal.  Even at the reduced price of $9.00 a pound.

1 + 2 = the following email I sent to my mother and sisters. 

"Does anyone have a good chicken chili or chicken casserole recipe?  I have a pound of chicken and I want a recipe that will make leftovers so it will go farther than just one meal."  Thank goodness for like-minded family, right?  My sister quickly responded with this recipe.  The hubs and I both enjoyed it the next night.  And for the next few days, too.  I liked it because it's cheesy but not creamy (think cream of so and so soup -- guh.  ross.).  The hubs liked it because he had lunch taken care of for the next several days.  Win win.

Ingredients

9 oz. whole wheat spaghetti
1 cup chopped onion
1 tablespoon minced garlic
29 ounces stewed tomatoes, undrained, chopped (You can buy canned, but I prefer boxed as studies have shown BPA is in many canned goods)
1 tablespoon worcestershire sauce
2 teaspoons dried italian seasoning
1/4 teaspoon salt
2 cups shredded cheese, divided
3 cups chopped cooked chicken

Directions

Cook the pasta according to package instructions and drain. 

While pasta is cooking,  heat skillet over medium high heat.  Add onion and garlic and saute until soft.  Add tomatoes, worcestershire sauce, italian seasoning, and salt.  Bring to a boil.  Reduce heat and simmer, uncovered, for 10 minutes.  Stir in 1 cup of cheese.  Stir in cooked spaghetti and chicken.

Pour mixture into casserole dish.  Top with remaining cup of cheese.  Bake at 350 for about 15 minutes or until hot.


Asian Coleslaw

This recipe is a great way to get your raw vegetables in.  Don't get me wrong, I love me some steamed vegetables, roasted vegetables, pretty much any way you prepare them vegetables.  7-year-old me's jaw just dropped to the floor, by the way.    It's strange how much my tastebuds have changed since I started the real foods adventure two years ago and even though I ate far more vegetables than 7-year-old me would've chosen to eat, vegetables weren't one of my favorite foods.  It's true, though, and I can't imagine going back.  Raw vegetables have their own unique health benefits, but sometimes I have a hard time getting raw vegetables in.  I can only eat so many heads of raw broccoli, right?

Enter this recipe.  Problem solved.  It is truly delicious (the hubs and the sister who was staying with us for a few weeks both agreed).  It's also vegetarian so you can serve it to anyone (assuming they don't have a nut allergy).  And it's something new and different for when you sign up to bring the salad to the next pot luck dinner.  Or perhaps the Memorial Day cookout you're attending this weekend. 

Don't be scared by the word Asian thinking it has to be served with Asian food.  The dressing is made up primarily of asian ingredients, but I served it with baked tilapia.  It would be great with anything, really.  And as an added bonus, it's good as leftovers and doesn't get soggy.  Give it a try and let me know what you think.

Ingredients

Dressing:
1/4 cup honey (next time I'll use half that amount or even omit it totally)
1/4 cup grapeseed oil
1/4 cup rice vinegar
1 tablespoon Bragg's liquid aminos ("real" soy sauce)
1 teaspoon sesame oil
1 tablespoon all-natural peanut butter
1/2 teaspoon salt
1/2 teaspoon Sriracha sauce (Thai hot sauce - optional, and I left it out)
1 tablespoon minced fresh ginger (I used 1 teaspoon dry ginger)
1 large garlic clove, minced

Slaw:
4 cups shredded cabbage
2 cups shredded carrots
1 red bell pepper, chopped
1 cup cooked and shelled edamame
2 medium scallions, finely sliced
1/2 cup chopped salted peanuts (or you can leave them whole)
1/2 cup loosely packed chopped fresh cilantro
 
Directions

Combine all of the dressing ingredients in a medium bowl. Stir until the peanut butter is dissolved. Set aside.

Combine all of the slaw ingredients in a large bowl. Add the dressing and toss well. Let sit at least ten minutes so vegetables have a chance to soak up the dressing. Taste and adjust seasoning if necessary.  Serve cold.


Recipe from here