Baked Tilapia with Lemon Caper Sauce


I have to admit I've been falling behind on my commitment to eat fish at least once a week.  I don't love fish, but I know it's good for me so I try to eat it regularly.  But because I don't love it (and there are so many other foods I do love) I don't always eat it as much as I should.  Ah, the catch-22.  Renewing my commitment to eat it regularly, however, I've been (reluctantly) looking for a good fish recipe. 

Then a few weeks ago my sister and her family were in town.  One night my brother-in-law treated us all and cooked dinner for us.  I was less than excited, in spite of the fact that I was having dinner prepared for me, because he said he was cooking fish.  Little did I know his fish would change my life.  Why?  Because the sauce he put on it was so good I would eat it every night if I could.  At long last, a fish recipe I can eat not because it's good for me but because I genuinely love the taste.  I can't eat it every night, unfortunately, because it has plenty of butter in it.  Not enough butter that it would be bad to eat once week  But enough that I shouldn't eat it every night.  Once a week is good, though.  Keeps things interesting.  And keeps me looking forward to fish night in our house.

Ingredients

3 tablespoons butter, softenend
1/8 teaspoon paprika
dash of nutmeg
1 pound fresh caught tilapia (or other white-fleshed fish)
2 tablespoons dry white wine (I used cooking wine)
2 tablespoons capers
1 teaspoon chopped parsley
1 teaspoon chopped chives
2 teaspoons fresh lemon juice
Salt and black pepper to taste


Directions

Preheat oven to 350°.

Combine 1 tablespoon butter, paprika, and nutmeg.  Rub the mixture over fish.  Place the fish in a baking dish. Pour wine into baking dish. 


Cover tightly with a lid or aluminum foil and bake until firm and opaque throughout, 20 to 25 minutes.

While fish is cooking sauté remaining butter in a small saucepan.  Add capers, parsley, chives, lemon juice, salt and pepper.  Bring to a simmer and cook 5 minutes more. 


Pour the sauce over the fish.  And get ready for the deliciousness.


(Recipe from The Joy of Cooking)

Tomato and Goat Cheese Tart with Rosemary Crust


So I have to admit...I got kinda annoyed with the hubs last week when I got home and discovered he had thrown away my absolutely stunning yellow tomato.  (What???  It's the first time I've gotten annoyed with him since we've been married!)  Granted, I should have used it sooner (I'm still getting used to how quickly fresh, local produce with no preservatives goes bad!), but I'm certain we could have salvaged at least part of that beautiful tomato.  I didn't get to take a picture of it.  It was so pretty, and this tart would be even prettier with a yellow tomato in the mix.  Alas!  Thank goodness I had a few other tomatoes on hand, thanks to my CSA, so I could make this tart.  This tart that made my mouth water when I read the ingredients.  Well, even when I just read the name of it really.

Tomatoes = summer.  Tomatoes + cheese = an even better summer.

I'm on a goat cheese kick -- for several reasons, not the least of which is the health benefits.  Plus I've had some in my refrigarator and am still committed to using what I have on hand before I buy anything new.  Don't worry, I have some leftover cow's cheese, too, but that has been reserved for topping homemade pizza (stay tuned for the recipe!) or cheese toast with breakfast or maybe even just an afternoon snack.  This recipe would also be good with cow's cheese because the rosemary crust is di.vine.  It would be good with any kind of cheese really.  But because the recipe called for goat cheese, and I because I had some on hand, I stuck with goat cheese.   Yummy.


The ingredients in the crust are all things I typically have on hand, so I anticipate I'll be making this tart a lot.  With whatever kind of cheese I have a hankering for. 

Ingredients

Crust

1-1/4 cups whole wheat flour
1/2 tsp salt
1 tsp minced fresh rosemary
1 stick chilled unsalted butter, cut into 8 pieces
4-5 tbsp ice water

Filling

6 oz fresh goat cheese, crumbled, about 1-1/3 cups.  (If you don't have goat cheese use mozzarella or any other cheese)
3 medium tomatoes, cored, peeled, sliced into 1/4-inch slices, and blotted dry between paper towels*
1 tbsp coconut or grapeseed oil
salt and freshly ground black pepper to taste

Directions

First, make the crust dough (at least 1 hour before you're ready to assemble the tart). Place the flour, salt, and rosemary in a food processor and pulse several times to combine. Add the butter and pulse until the mixture resembles pea-sized crumbs, about ten 1-second pulses.


Add the water, 1 tbsp at a time, and pulse briefly after each addition. After 4 tbsp of water have been added, process the dough for several seconds to see if it will come together. If it does not, add the remaining 1 tbsp water. Process just until the dough comes together in a rough ball. (Do not overprocess or the dough will not be flakey).


Transfer the dough to a lightly-floured work surface and knead briefly to form a smooth ball. Flatten the dough into a 5-inch disk.


Wrap the dough in plastic wrap and refrigerate for at least 1 hour and up to 2 days.

Note 1:  The final dough should be smooth and supple before refrigerating so add some flour if it's too sticky. Also, if you don't have a food processor, you can still make the dough by using forks or a pastry blender to cut the butter into the flour mixture, then add your water.

When you're ready to cook the tart, move an oven rack to the middle position and heat oven to 375 degrees.

Unwrap the chilled dough and roll it into a 12-inch circle on a lightly floured surface. Lay the rolled dough over a 10-inch tart pan with a removable bottom, fitting the dough into the bottom and sides of the pan.  Trim the excess dough. Prick the bottom of the tart shell all over with a fork.

Note 2: I didn't have a tart pan so I used my spring form pan.  It wasn't quite as pretty since I just guessed how high to bring the dough up the sides, and I trimmed it with a knife, but it still tasted good and even had a pretty presentation.

Spread the goat cheese evenly across the bottom of the dough. Arrange the tomatoes over the cheese, overlapping them slightly. Drizzle the tomatoes with the oil and sprinkle with salt and pepper. 

Imagine how pretty this would be with yellow tomatoes, too!

Bake until the edges of the crust pull away from the sides of the pan and are golden brown, 45 to 50 minutes. Cool the tart on a wire rack for at least 10 minutes. Cut the tart into wedges and serve.  


This tart is really good at room temperature or even cold so feel free to make this ahead and let it cool for several hours.

* To dry tomatoes, lay 3 layers of paper towels on a flat surface. Place your tomato slices on the paper towels, and then cover with 3 more layers of towels. Gently press your hands over the tomatoes to extract as much liquid as you can without crushing the tomatoes. When you lift the slices from the towels, many of the seeds should stay behind. This will keep your tart crust from becoming soggy.


(Recipe from www.bellaeats.com and  A Year in a Vegetarian Kitchen by Jack Bishop)

Pea and Almond Couscous


Like I said last week, I'm really trying to be better about using whatever I have in my pantry before I buy more ingredients.  This recipe was perfect for that as I pretty much keep everything on hand that it calls for.  I typically keep whole wheat couscous on hand because it is a good substitute in place of rice or quinoa.  You know, helps keep things interesting.  Plus it's v. easy to prepare as it requires little more than the addition of hot water and fluffing with a fork.  And it's healthy to boot.  Protein?  Check.  (about 6 grams per serving).  Selenium?  Check.  (Selenium is an antioxidant commonly used to protect blood vessels from atherosclerosis, a condition that causes the buildup of plaque and narrowing of the arteries and can result in heart stress and cardiovascular disease.)  Potassium?  Check.  All of this AND it tastes good.  Win win.  Actually with its easy preparation, health benefits and good tasta I guess that would be win win win.

I've also had some peas in my freezer for a month or so that I bought before I could get them at the farmers' market and then when I could get them at the farmers' market I was using fresh peas instead of frozen.  So I needed to use up my frozen peas as they were in danger (and might actually have succumbed to) freezer burn. 

This recipe was a perfect way to use up some more ingredients and try a little something different.  Not bad for not going to the grocery store.  So keep this little nugget on hand for when you're in a pinch.  Oh, and make sure you keep healthy items like whole wheat couscous and almonds on hand, too.

Ingredients

2 tablespoons butter
1/2 onion, chopped
1/2 cup sliced raw almonds
3 cups free range chicken broth
1/4 teaspoon salt
1/4 teaspoon pepper
1 1/2 cups whole wheat couscous
1/2 cup frozen peas (or fresh if you have them)

Directions

Cook onions and almonds in butter over medium heat in a medium sized saucepan until onions are soft. Add chicken broth, salt and pepper. Bring to a boil. Stir in couscous and peas. Cover and let sit for 10 minutes or until all of liquid is absorbed. Stir to combine and fluff with a fork.

(Recipe from www.kitchensimplicity.com)

Goat Cheese and Asparagus Crustless Quiche


Goat cheese = delish.  Goat cheese also = healthy.  It's lower calorie and lower fat that cow's cheese and it has a high calcium and protein content.  It contains probiotics (the "good" bacteria that aid gastrointestinal health in the human body) and it's easier to digest so even people who are lactose intolerant can eat goat cheese.  These benefits are just a few of the numerous health benefits of goat cheese.

Don't get me wrong, I love cow's cheese.  Always have.  Always will.  But I also love goat cheese for it's somewhat milder taste and it's creamy texture.  I grew up eating goat cheese because my mother loves it.  And I'm so glad she does because I reaped the benefits of it growing up!  If you haven't ever tried goat cheese, you're missing out, so go out and buy some this weekend.

This recipe is the perfect way to break yourself in if you're unsure.  Combined with eggs and asparagus, the goat cheese isn't overpowering.  Not that goat cheese is overpowering anyway.  But still, if you're scared of it. this recipe is a good one to try.   And if you're not scared, this is still a good recipe to try because it's delicious. 

I got the beautiful pie pan pictured above as a wedding gift from my sister's mother-in-law.  So sweet, right?  It's made by a local potter, which makes me love it even more.  As I've become more and more of a locavore I've become more and more of a loca-everything.  So not only did I get to use my local goat cheese, I also got to use a pie pan from a local potter.  Win Win.

Ingredients


1 lb. asparagus, trimmed and cut into 1-inch lengths (optional: reserve tips for garnish)
1 tsp coconut oil
2 large shallots
2 cloves garlic, peeled
5 oz. fresh goat cheese
2 large eggs
5 large egg whites


Directions


Coat 4 ramekins or a 9-inch baking pan with coconut oil or butter.  Toss asparagus in coconut oil in bowl and season with salt and pepper.  Put asparagus in ramekins or baking pan and place in the oven.  Preheat to 425.


Meanwhile, place shallots and garlic in bowl of food processor and process until finely minced.  Add goat cheese and process until creamy.  Add eggs and egg whites and puree until smooth.  Season with salt and pepper.


Pour egg mixture over asparagus in ramekins or baking pan once oven is preheated, stirring to distribute vegetables evenly.  Bake 15 minutes or until top is light brown and tester inserted in center comes out clean.  Garnish with asparagus tips, if using.


(Recipe adapted from Vegetarian Times, January/February 2011)

Baked Potato with Ricotta and Roasted Tomatoes

Are any of you younger siblings?  If so, you'll know what I mean when I say that younger siblings a.d.o.r.e. their older siblings.  It's true.  And we younger siblings typically don't outgrow it.  I'm the youngest of five and let me tell you.  I did everything my older sisters did.  Or asked me to do.  To this day it's a struggle for me to let my nails grow out because one of my older sisters bit her nails.  (At least she still bites hers whereas I have (mostly) outgrown it!).  I remember vividly going to visit another sister when she went to college (Hotty Toddy, y'all!) and feeling very cool because while all my other 7th grade friends were at the movies with their parents close by, I was spending the night in a college dorm.  What else I remember vividly, hilariously enough, is what she ate for breakfast.  So wanting to do everything my sisters did, for at least a month after I came home, I wouldn't eat anything for breakfast except toast with peanut butter and banana on top. 

Another thing she ate was baked potatoes with cottage cheese and italian dressing on top.  It sounds gross, but it's really quite good.  I never got over that one, and when I, myself, was in college  (again...Hotty Toddy, y'all!), my sorority house had baked potato day for lunch on Thursdays.  So every day I loaded up my baked potato with cottage cheese and italian dressing.  When I saw this recipe, it reminded me of college.  And then of 7th grade.  And then of my sister.  And literally three days later I was at the farmers' market and saw a beautiful pint of cherry tomatoes:  


AND my CSA included some potatoes.  So naturally I was thrilled when I came across this recipe on one of the blogs I check regularly.  And I'm glad I did.  It's a slightly fancier version of my sister's baked potato she ate in college calling for ricotta instead of cottage cheese and the roasted tomatoes are so pretty!

Ingredients

2 russet potatoes
1 pint cherry tomatoes 
1 tablespoon plus 1 teaspon of olive oil
Salt and pepper to taste
Fresh thyme
1 cup fresh ricotta


Directions

Preheat oven to 400 degrees. Rub the potatoes with a teaspoon of olive oil.  Poke holes in them with a knife and place on a baking sheet.  Bake until they are tender when pierced with a knife, about 60 or 75 minutes.


Line a baking sheet with foil and toss the tomatoes with one tablespoon of olive oil, salt and pepper. 15 minutes before the potatoes are done, put the tomatoes in the oven with the potatoes and roast them until they start to split.


Split the potatoes.  Top with ricotta cheese, roasted tomatoes, and fresh thyme.  Serve half as a side dise or a whole potato as an entree with yummy vegetables on the side.


(Recipe from www.realsimple.com)

Lime Cilantro Quinoa Salad

I've been trying to be better about using the food that I have on hand before buying more. How many times have I thrown food out because I forgot I had it? Too many to admit. That's all changing, though. Especially now that I'm part of a CSA and the food might go bad before I have a chance to forget about it. It's great! 

Last week I was looking in my pantry and saw half a box of quinoa, leftover from the last time I had cooked with it...several weeks ago. Maybe months. Yikes. So I promised myself I would make something with it before the week was out. I thought about making quinoa porridge on the night we had our standard breakfast for supper, but I wanted to try something else. Just because. I found the following recipe and was pretty excited to try it. Making quinoa kind of makes me feel like my mother, since she cooked quinoa long before I had heard of it anywhere else. And that's a good thing. It's always a good thing to feel like my mother. Because she's best.  Here she is with her five girls:


Ok, back to the quinoa.  This recipe is perfect for a hot summer day.  It's light and refreshing with a hint of lime flavor.  And with the heat index in the 100 degrees+ here in Nashville, light and refreshing is good.  This recipe might be the only thing that's felt light and refreshing in the last week.  

It's great as a side.  I also had some leftover rotisserie chicken in my refrigerator, so in the interest of using everyting I have on hand before buying anything new (see above), I shredded the chiecken and added it to the salad the next day to make it a little more substantive.  It was a perfect (light and refreshing) lunch as well.  So hurry out and get some quinoa (or maybe you had some in your pantry like I did and have been eyeing it, trying to think of a new way to use it) and try this recipe.  I think you'll like it.

Ingredients

Salad

3 cups cooked whole grain quinoa (1 cup dry)
¾ cup dried fruit 
¼ pine nuts, toasted
¼ cup cilantro, chopped
1 bell pepper, any color, diced

Dressing

¼ cup lime juice
¼ cup olive oil
1 teaspoon Dijon mustard
2 garlic cloves, minced
Pinch of salt

Directions

Put all salad ingredients together in a large bowl and mix together.


In a separate bowl, whisk together all dressing ingredients.  Pour the dressing over the salad and mix thoroughly. 


Garnish with more cilantro. 


This can be eaten warm or stored in an airtight container in the refrigerator and eaten as a cold salad.   


Homemade Larabars

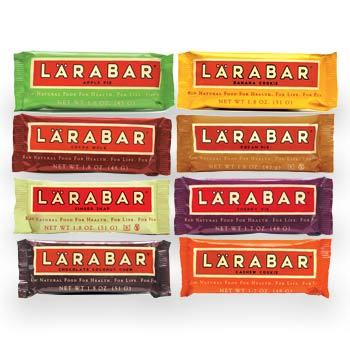
These guys, they're delicious.
photo from here

You know what else they are? Well, the correct answer is not cheap. But they are so, so good. 100% natural. Fewer then four, maybe five ingredients. No added sugar. And yet perfectly sweet. Truly they taste like a treat. I could go on and on. As Mary Poppins would say, they're practically perfect in every way. Practically perfect, not actually perfect, because I can't get past the cost. 

A few weeks ago, I got a text message from a friend telling me that I should feature larabars on this blog. She's a faithful follower (thank you, Alyana!) and she said she'd love a recipe. Loving my followers as I do, I can't help but oblige when they ask for a recipe. So, here you go, Alyana. I've been wanting to try this recipe for awhile, and Alyana just pushed me over the edge. So you can thank her when you realize how easy (and yummy) and how much cheaper it is to make your own larabars at home.  And if you want to try other recipes (think along the lines of chocolate) visit this blog.

Ingredients*

1/2 cup dried blueberries
1/2 cup dates
2/3 cup almonds
1/2 teaspoon finely grated zest
1 drop almond extract

Directions

Place blueberries, dates, and almond extract in a food proccessor and blend until it turns into a thick paste.


Place nuts in food processor and pulse until finely chopped. Add nuts to the paste mixture and knead together with fingers until well mixed. (The mixture is very sticky, so just get ready!).


Place onto cutting board or other flat surface and form into long rectangle. 


Score and then cut into individual bars.


Store in airtight container.

*Another similar recipe (not listed on the above-blog). Same directions, different ingredients. 1/2 cup dried cherries, 1/2 cup dates, 2/3 cup almonds, 1/8 teaspoon cinnamon.


(Recipes from The Real Food Diet Cookbook by Dr. Josh Axe)

Chicken with Mushroom Cream Sauce

Sometimes you just need a little comfort food, ya know?  Like perhaps on a Sunday night when we know work is just around the corner again.  In the winter the hubs and I eat grilled cheese sandwiches, like this one, and homemade soup every Sunday night.  It's kinda the best thing ever.  It's easy and the very definition of comfort food to me.  And it's a good excuse to experiment with new soups.  But there's something entirely less appetizing about hot soup on a hot day.  So that leaves me scrambling for a new comfort food recipe.  This one does the trick.  And it's as easy as grilled cheese and soup (especially if you use a rotisserie chicken instead of cooking the chicken yourself).  Double whammy.  Wait, no cream of anything soup.  Triple whammy.

Ingredients

2 tablespoons coconut or grapeseed oil
1 tablespoon cider vinegar
6 cloves garlic, minced
1 teaspoon paprika
salt and ground black pepper
Pastured otisserie chicken (enough to serve 4 - 6 people)
1 pound sliced button mushrooms
1/2 cup or more cream (or half and half)
1/2 cup or more white wine (cooking wine is ok)
1 tablespoon chopped fresh thyme
1 scallion, finely sliced
Brown rice, prepared according to package instructions


Directions


In a large saute pan over medium-high, heat the oil.   Add the mushrooms and garlic and saute until browned, about 8 minutes. 


Add the chicken along with the salt, pepper, paprika, and thyme. 


Add the cream and the wine and stir to combine. 


Bring to a simmer and cook until chicken is heated through.  Serve chicken and mushroom sauce over brown rice, which has already been prepared according to the package instructions. Garnish with sliced scallions and paprika.


(Recipe slightly adapted from our local newspaper, The Tennessean)

Banana-chocolate Bread

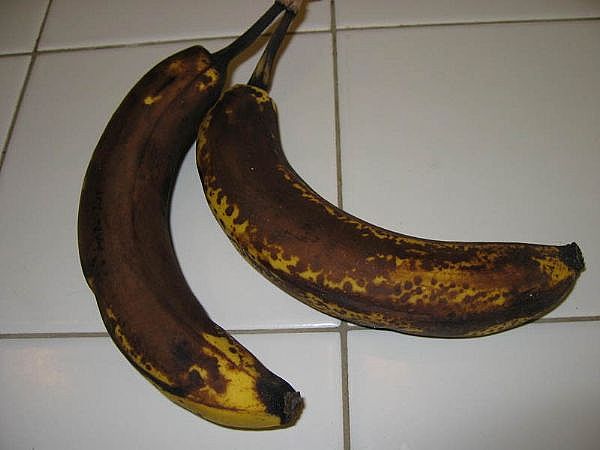
I go through phases of what fruit I love.  Thankfully, I generally love what's in season (right now I can't get enough watermelon!), but some fruit, like banana, isn't ever in season where I live so I just eat it when I want it.  Recently I was on a banana kick, but my sister was in town so I ate at my parents' house a lot.  Which means I neglected the food in my own pantry.  One night I came home and realized my bananas looked like this:


Ok, granted these aren't the ripest bananas I've ever seen.  I mean, they could have looked like this:

over-ripe-banana

Gross.  But still, they were ripe enough that I didn't want to eat them alone.  So I decided I would make banana bread.  I don't have a go-to banana bread recipe because truth be told I don't love banana bread.  But I consulted The Best Recipe, a cookbook by the editors of "Cook's Illustrated" Magazine because I figured if anyone had a fail  safe banana bread recipe it would be The Best Recipe

I've mentioned my love of chocolate (the darker the better), right?  It's true.  I am a sucker for dark chocolate.  Sometimes I buy it and make my husband hide it so I don't eat too much at once.  (Is it embarrassing that I just admitted that?)  So imagine my delight when I found a recipe for banana-chocolate bread.  A way to use my overripe bananas and incorporate chocolate.  It seemed too good to be true.  But I tried the recipe.  And it wasn't.  Plus you'll notice that I tagged this recipe as "dessert" and "breakfast."  Again, seems too good to be true.  But it's not.  Hurray! 

(Note: The Best Recipe also has a recipe for Banana-Coconut Bread with Macadamia Nuts and Orange-Spice Banana Bread, both of which are now on my "to make" list.  Let me know if either of those sounds especially delicious to you, and I'll move it up to the top of my list).

Ingredients

1 cup white whole wheat flour
2/3 teaspoon baking soda
1/2 teaspoon salt
2 1/2 ounces grated or finely chopped dark chocolate, at least 70 percent (a heaping 1/2 cup)

     *True confession: Although I had overripe bananas on hand, I didn't have any dark chocolate on hand.  So I settled for dark cocoa powder.  I didn't measure it, just added a few shakes (probably no such thing as too much!).  So you can do it either way.  The loaf I made was delish, but if I know The Best Recipe, their version with chocolate instead of cocoa will be even better.

1 1/4 cups toasted walnuts, coarsely chopped (optional)
3 very ripe bananas, mashed well (about 1 1/2 cups)


1/4 cup plain yogurt (not low fat)
1/2 cup plus 2 tablespoons honey
2 large pastured eggs, beaten lightly
6 tablespoons butter, melted and cooled
1 teaspoon vanilla

Directions

Adjust oven rack to lower-middle position and heat oven to 350.  Grease and flour the bottom only of a regular loaf pan, or grease and flour the bottom and sides of a nonstick loaf pan.  Set aside.

Whisk flour, baking soda, salt, dark chocolate, and walnuts together in large bowl.  Set aside.

Mix mashed bananas, yogurt, honey, eggs, butter, and vanilla in medium bowl.  Lightly fold banana mixture into dry ingredients with rubber spatula until just combined and batter looks thick and chunky. 

Remember that I used cocoa powder, so your batter won't be as dark if you stick with the grated chocolate.
Scrape batter into prepared loaf pan. 


Bake until loaf is golden brown and toothpick inserted in center comes out clean, about 55 minutes.  Cool in pan for 5 minutes, then transfer to wire rack. 


Serve warm or at room temperature.


(Recipe slightly adapted from The Best Recipe)

Asparagus with Mustard Vinaigrette

The hubs loves asparagus. I do, too, but secretly I make it so that he'll think I'm making it just for him. (Don't tell him, though.). Asparagus is one of those versatile side dishes in that you can you can cook it just about any way and it's good.  Grilled asparagus? Yes, please!  Roasted asparagus with oil, salt, and pepper?  Yes, please!  Asparagus with mustard vinaigrette?  Yes, I'll have some of that, too.  And now, so can you.

Ingredients

2 lbs asparagus
3/4 cup pecans
1/2 cup olive oil
1/4 cup red wine vinegar
1 tablespoon stoneground mustard
1/8 teaspoon sea salt
black pepper, to taste

Directions

Preheat oven to 300 degrees.

Whisk together olive oil, red wine vinegar, mustard, salt and pepper in a small bowl and set aside. 

Place pecans on a cookie sheet and toast until fragrant and lightly browned.  Remove and set aside to cool.


Snap off tough ends of asparagus (I always think that's so much fun!  Aaah, it's the little things.) and steam asparagus until it reaches desired firmness. 


Remove from heat and place on serving dish.  Drizzle with prepared vinaigrette, top with pecans, and serve immediately.


(Recipe from The Real Food Diet Cookbook by Dr. Josh Axe)

Vitapops

What did you do for the 4th of July?  This holiday is my favorite of the whole year.  Maybe because it's followed immediately by my birthday, but I think it would be my favorite holiday even if my birthday weren't the next day.  I mean, you take a day off work (PTL for that, right?) cook out, maybe go to the lake, watch fireworks, celebrate America.  It can't get any better than that!

This year we were at my parent's house along with three of my four sisters, 9 of my 12 nieces and nephews, and my uncle and his family.  Great family time.  We ate burgers (grass fed beef, of course!), walked around the Franklin square, watched fireworks and . . .

ate these:


What are these?  Well, they're vitapops.  Created by my sister, Amanda.  And y'all.  I don't even have the words for the deliciousness.  This is not just a plug for a family business.  Promise promise.   Vitapops are all-natural, no sugar added, vitamin enhanced gourmetpopsicles.  If you live in Nashville, you've had las paletas, right? These popsicles are an all-natural answer to las paletas.  And they are deeeelish!  (Also, if you're in the counting calories camp, all of them are between only 30 and 100 calories). 


Better yet, in honor of our sweet Muth and her battle with cancer, Amanda is giving 10% of all proceeds she makes to the Charles Simeon Trust, the charity of our Muth's choosing!

Amanda has 21 different flavors (and is always experimenting to add new flavors).  Everything from coconut to apricot green tea to blueberry almond to watermelon mint.  Contact her to place an order (minimum 5 per order, $2.50 a pop).  She does everything from small orders to weddings.  It's true.  So contact her at amanda@vitapopsrock.com.  I promise you won't be disappointed.

Bean Salad

Is there anything more American than cooking out on the 4th of July?  Cooking out is such a great summer tradition and even more so a great 4th of July tradition.  It doesn't really feel like the 4th without a cook out, preferably on a lake.  Well, it would be a great tradition for us except our grill got stolen.  I mean, really.  Who steals?  And who steals a grill??  And who sees someone strolling down the street with a grill and doesn't stop them???  But I guess that's neither here nor there.   Thank goodness we have friends and family with grills so we still get to partake in this great tradish.  And, of course, no cookout is complete without a good bean salad.  So voila, a real foods bean salad for all your cooking out needs.  And just in time for your 4th of July cookouts.  If you were tapped to bring a side dish, this recipe is perfect.  For that matter, even if you're the one providing the meat, you can throw this bean salad together and have an extra side.  It's that easy.  And it's worth it because it's that good.  Happy grilling.  And happy Independence Day!

Ingredients

1 (15 ounce) can black beans, rinsed and drained (or dried beans soaked overnight)
1 (15 ounce) can kidney beans, rinsed and drained (or dried beans soaked overnight)
1 (15 ounce) can cannellini beans, rinsed and drained (or dried beans soaked overnight)
1 green bell pepper, chopped
1 red bell pepper, chopped
1 (10 ounce) package frozen corn kernels (or fresh corn if you can get your hands on some)
1 red onion, chopped
1/2 cup olive oil
1/2 cup red wine vinegar
2 tablespoons fresh lime juice
1 tablespoon fresh lemon juice
1 tablespoon salt
1 clove crushed garlic
1/4 cup chopped fresh cilantro
1/2 tablespoon ground cumin
1/2 tablespoon black pepper
1 dash hot sauce (optional)
1/2 teaspoon chili powder (optional)
  • Directions

In a large bowl, combine beans, bell peppers, corn, and red onion.


True confession #1: I didn't have a red bell pepper, so I left it out.

In a small bowl, whisk together olive oil, red wine vinegar, lime juice, lemon juice, sugar, salt, garlic, cilantro, cumin, and black pepper. Season to taste with hot sauce and chili powder, if desired.

True confession #2: I didn't have enough red wine vinegar so I used half red wine vinegar and half balsamic vinegar.  While this worked in a pinch, I've made it both ways and think it's better with all red wine vinegar.

Pour dressing over vegetables, and mix well. Chill thoroughly, and serve cold.


(Recipe slightly adapted from this one on www.allrecipes.com)