Herb Butter Halibut


What???  $40 on fish for two people?  Surely you jest!  Alas, the hubs wasn't kidding when he told me the price of the fish I had told him to get.  Who knew halibut was so expensive?  I guess I'll chalk it up to a (very expensive) lesson learned in communication.  Turns out the the hubs can't really read my mind.  Although he should be able to, right?  So when you're making this recipe (and make it you should) maybe put "cheaper than halibut white fish" on your grocery list. 

Expensive lesson aside, this recipe is really good.  Smooth like butter.  That's what this fish tastes like.  And well it should, for $38.98!  The good news, though, is that the type of fish isn't what made this recipe so good.  It was the combination of butter and basil.  So you can enjoy it on the cheap.  And so will I next time I make it.

PS...I apologize for the lack of pictures in this post.  I think I was probably still in shock from the price of the fish to remember to take photos!  Good thing the recipe is pretty self-explanatory.

Ingredients

1 pound wild caught halibut filets (or any cheaper white fish you prefer)
1/2 teaspoon of sea salt + 1/2 tsp of black pepper mixed in small bowl
1 cup free range chicken or vegetable stock
2 tablespoons grassfed butter
Juice from half of one lime
1 teaspoon honey
1/8 teaspoon of sea salt
Pinch of black pepper
1/2 cup fresh basil leaves, chopped


Directions


Sprinkle both sides of fish with salt and pepper mixture.  In a medium sauté pan, heat stock and steam filets (covered) for 4 - 5 minutes, depending on thickness. Once done, remove from pan and set aside.  Cover with foil to keep warm.

Add butter to remaining stock in sauté pan to melt.  Stir in lime juice, honey, salt and pepper. Add basil and stir.

Pour herb butter evenly over cooked fish. Serve immediately.


(recipe slightly adapted from www.thefresh20.com)
 

Menu

As promised, here is our menu for this week.  As you saw last week, and again today, I only plan meals for five nights a week.  In my experience, something comes up -- be it church, dinner with friends, yoga, or any number of things -- that conflict with a sit down dinner at home a couple of nights a week.  So I plan five meals a week.  In the off chance that we're home for seven meals together at home, we either eat leftovers, brupper, egg salad sandwiches, or something along those lines.  I keep homemade bread on hand but if you don't feel inclined to make homemade bread, I recommend Ezekial bread.


Monday: Balsamic glazed cod (recipe from this website) and steamed broccoli
Tuesday: Tarragon chicken linguine (recipe also from this website) and grilled squash
Wednesay: whole wheat pizza pockets (I have the ingredients left over from last week because I didn't make them) and brussels sprouts
Thursday: quesadillas, butternut squash soup and spinach salad
Friday: Lasagna tart (recipe from this blog) and smashed cauliflower

Orzo with Goat Cheese, Peas, and Mint


If the picture above looks familiar, it's because you might remember a few weeks back when I posted this recipe, one I made in an effort to use up my frozen peas and because I had some couscous on hand.  It was pretty good, right?  Well, this one might be better.  When I was buying the ingredients for this recipe I got the whole wheat orzo at Whole Foods.  At the time I was annoyed because the only box of whole wheat orzo I could find was much larger than the refined flour orzo (as in like 4 times as big), and I didn't need such a big box for just the two of us. But when I tasted the finishd product I was so glad! I only used about a quarter of the orzo in the box, so now I have plenty to make several more batches.  

Instead of couscous, this recipe calls for orzo (a rice shaped pasta).  It also calls for goat cheese.  Have I mentioned that I'm really loving goat cheese lately?  Our local farmers' market has a goat's dairy farmer and his goat cheese and milk are really fresh and yummy.  And local, obviously, which is always a plus.  Goat cheese and mint and lemon zest.  Pretty delish.  And it can be eaten hot or cold so you can eat it for dinner one night and have the leftovers for lunch the next day without even having to reheat it.  Just spoon it out and enjoy.  Anything that makes life a little less hectic without sacrificing flavor wins.  Because I don't know about you, but when I find good, real foods recipes that are quick to enjoy, well, I'm quick to make them. 

Ingredients

1 pound whole wheat orzo, cooked 
1/4 cup olive oil
1/4 teaspoon lemon zest 
1 cup peas, fresh or frozen and thawed
6 ounces crumbled goat cheese 
2 tablespoons chopped fresh mint
Salt and pepper to taste

Directions

Cook orzo according to package directions.  Combine hot cooked orzo with olive oil and lemon zest.  Stir in remaining ingredients. 


Can be served warm or cold.


(recipe from www.framedcooks.com)

Pork Chops with Peaches


The hubs and I have turned into almost vegetarians.  I say almost vegetarians because although we do eat meat, we don't eat that much.  We certainly don't eat meat at every meal.  Michael Pollan has written a great book, "Food Rules," that has really good, really easy to remember rules by which to eat.  One of his rules is to treat meat as a special occasion food, perhaps a couple of times a week.  He says there is evidence that the more meat there is in your diet, the greater your risk of heart disease and cancer. 

As an aside, this book doesn't go into any scientific data, but it's a great book to have on hand for general principles of eating.  Even without the scientific data, I trust Michael Pollan's "Food Rules" pretty well based on his other works including "The Omnivore's Dilemma."  

So, back to his rule about eating meat just a couple of times a week.  He calls people who do so "flexitarians."  So I guess the hubs and I, without consciously meaning to, have turned into flexitarians (we probably eat meat 3 times a week).  Consequently, we can afford better meat, thus following another food rule: eat meat from animals that have themselves eaten well, e.g. grassfed beef, free range eggs, etc.  We get our meat from a local farmer, and it is always delish.  These pork chops were no exception.

Ingredients

2 tablespoons grapeseed oil
3/4 teaspoon salt
1/2 teaspoon black pepper
4 pastured pork chops
1/2 onion, cut into long, thin slices
1 cup free range chicken stock
2 peaches (or nectarines), peeled and sliced into wedges
1/8 teaspoon cayenne pepper

Directions

Season pork with salt and black pepper.  Heat oil in a skillet and place pork chops into skillet, browning one side for 4 minutes.  Flip over and cook for an additional 3 minutes browning the other side.


Remove from heat and cover with foil. The pork will continue to cook while covered.  Let pork chops sit for 5 minutes before removing foil.

While pork is resting, add onions and chicken stock to skillet. Sauté for 5 minutes then add peaches and cayenne pepper. Simmer for 5 minutes.


Pour mixture over resting pork.


(recipe from www.thefresh20.com)

Menu

If I've said it once in the past year, I've said it 100 times.  The key to eating real foods, to eating right, is organization.  Every Friday night (sometimes Thursday night or early Saturday morning if I'm busy on Friday night) I plan my meals for the next week.  After I plan my meals I make a farmers' market list and grocery store list.  Then every Saturday morning the hubs and I hit the farmers' market followed by the grocery store.  It's become our routine, and I love it.  I love having a fully stocked refrigerator and pantry by Saturday afternoon.  So the next week I don't have to think.  I just come home from work, check my menu list, and start cooking.  I would love one day to be able to cook a lot of food in advance and stock my freezer so when I'm in a pinch I can just pull something out of the freezer.  That's for another day and another time, though.  A day and time when my Saturdays (i.e. my one errand day of the week) aren't so precious.  Until then, I'm happy with my Friday night planning, Saturday morning shopping routine. 


I've had a lot of people ask me for my menus, just to give them ideas of what to cook.  Because let's face it, we all get in ruts.  So I'm going to try to post my menus every Sunday for the upcoming week.  Maybe it will give you ideas for your meals.  Or maybe it will inspire you to plan your own menus a week in advance.  I hope it helps!  Let me know what you think.


So without further ado...

Monday:  taco salad (recipe from this blog) and steamed broccoli
Tuesday:  whole wheat pizza pockets (recipe also from this blog) and salad
Wedneday: brupper (aka breakfast for supper)
Friday: pork chops (recipe also from the fresh 20 (I'll post it, too, if it's good)) and brussels sprouts

Beet and Pear Soup


Ok, I get it.  This recipe sounds like the randomest thing you've ever heard.  And besides, beets and pears don't sound that appetizing when mentioned in the same sentence.  "Beets" might not sound appetizing regardless of what sentence it's in.  But before you ignore this recipe, remember the sesame carrots I told you about.  I was right then, right?  You must give snacksanddesserts the benefit of the doubt! 

Background: I recently purchased a groupon for the website The Fresh 20.  The Fresh 20 is a meal planning service that provides healthy and homemade dinners using fresh, seasonal ingredients.  For $5.00 a month you get five weekly meals planned for you along with a grocery list.  I'm only on week one, so the jury is still out as to whether or not it's something I'll be happy with, but this working (slash blogging) girl could use some help every now and then so I figured I'd try it. 

When I first saw the recipe for beet and pear soup I thought it was a bit random, but being the fan of beets that I am, I was interested.  The hubs, on the other hand, was far from interested.  Unless you count his interest in throwing the recipe away.  But because I paid for the meal plan I figured we should give it a fair shot.  Plus, selfishly, like I said, I like beets and wanted to try it.  (As an aside, I remember when I was little wondering why my sweet mother would cook meals that she knew my father wasn't going to be thrilled about eating.  Ha.  Bless my heart, I had no idea.) 

This soup was surprisingly good and didn't taste too much like beets.  It even passed hubs' taste test.  We ate it hot for dinner (along with some whole wheat cheese toast), and I had it cold the next day for lunch.  Each meal was equally enjoyable so if it's especially hot where you are, go for the cold. 

Ingredients

2 tablespoons grapeseed oil
2 medium carrots, peeled and cut into 3" pieces
1/2 medium onion cut into quarters
2 celery stalks, cut into 3 " pieces
2 cloves garlic, smashed
2 beet root bulbs, peeled and cut into eighths


2 pears, peeled, cored and cut into quarters
24 oz vegetable broth
Salt to taste

Directions

Heat grapeseed oil in a medium stock pot.  Add carrots, onions, and celery and saute for 5 minutes, stirring occasionally. 


Mix in beets and garlic.  Cook for 3 - 4 minutes then add pears and vegetable broth.  Let simmer for about 5 - 10 minutes.


Note: after cooking, and before the next step, remove eight pieces of the beets (the equivalent of one beet) and save in an airtight container for another meal of your choice.

Transfer everything to a food processor or blender


Puree on high for 2 minutes or until smooth.  Add salt to taste.   Serve hot or cold.


(Recipe from www.thefresh20.com)

Granola/Granola Bars

I love a good bowl of granola.  Sometimes I like it with milk (raw, of course) and fruit on top.


photo from here

And sometimes I like it with plain yogurt in lieu of milk for a little extra substance.  Lately I've been on a granola with yogurt kick.  Well, backup.  Lately I've been on a Starbucks latte kick.  Nothing better than a double tall, whole milk, decaf, one honey latte (decaf because caffeine makes me lethargic in the afternoons once the high has worn off).  But alas.

photo from here

=

photo from here

And my bank account is none too happy about my recent habit.  The hubs has tried to make me lattes at home.  Let's be honest, though, there's just something about Starbucks.  Or about Dose, Fido, or Bongo Java, some local coffee shops here in Nashville.  At the end of the day, storebought lattes are just plain delish.  But I digress.  Granola.  That's what we're talking about.

So I'm on a granola kick as I try to kick my double-tall-whole-milk-decaf-one-honey-latte-for-breakfast habit.  The problem is that most store bought recipes have lots of refined sugar.  And the all natural granola is expensive.  Enter my friend who also eats an all natural diet.  She shared this recipe with me and it is delish.   All natural.  Inexpensive.  Easy.  Win win win.  It also makes a lot and can be stored in the freezer so it lasts a long time (if you can stop yourself from grabbing a handful every time you're in the kitchen.)

Ingredients

2 lb rolled oats (not instant or quick cooking)
1/2 lb coconut, unsweetened
1/2 lb raw almonds, slivered or whole
1/2 lb raw pumpkin seeds
1/2 lb chopped walnuts
1 tablespoon cinnamon
3/4 cup maple syrup
3/4 c honey
1 cup sunflower oil
2 tablespoons vanilla
1-3 cups dried fruit

Directions

Preheat oven to 275.  Mix oats, coconut, almonds, pumpkin seeds, walnuts, and cinnamon in a bowl.  In a separate bowl mix maple syrup, honey, sunflower oil, and vanilla.   Stir well to combine.  Add the wet ingredients to the dry ingredients, stirring to combine.  Pour the mixture onto a baking sheet and bake at 275, stirring every 15 minutes, until brown, about 1 to 1 1/2 hours.  Remove from oven.  Pour fruit on top and allow the pan to sit for 15 minutes until crunchy.  Store in airtight container at room temperature or in freezer (not in the refrigerator).

*You really can't mess this up as far as ingredients go.  If there is something you don't like leave it out or replace it with something you like more.

** For granola bars: after the granola cools,  add 3 beaten eggs to 3 cups granola.  (You could also add dark chocolate chips if you want to add a little sweetness).  Pat into square baking pan.  Bake at 350 for 15 minutes.  Note: the eggs dillute the sweetness somewhat so the bars aren't quite as sweet as the cereal.

Salisbury Steak with Mushroom and Onion Reduction Sauce

Am I the only one who really wanted to be on the meal plan at school growing up? I mean, seriously, if I couldn't take lunchables for lunch I could at least be on the meal plan.  Come on, a girl's gotta fit in somehow, right? 

Wrong.  Thank goodness, my mother didn't ever give in and put us on a meal plan.  We might have gotten to eat school food every now and then as a "treat," but never regularly.  In hindsight, I'm so glad we didn't since most school cafeteria plates look like this (or at least used to look like this):

photo from here

As always, my mother was right and I am so thankful she didn't let me eat that stuff!  I'm also thankful for websites like www.nourishedkitchen.com so I can find grown up, actually healthy, versions of the school cafeteria food I wasn't allowed to eat.  Somehow eating this salisbury steak as an adult satisfies my innter third grader who was dying to eat cafeteria food.

By healthy, I mean the real thing.  Nothing processed, pre-packaged, or frozen about it.  This won't cut it:

photo from here

No, this recipe is real.  And delish.  Grass fed beef.  Fresh mushrooms.  Thyme.  Try it.  I'm positive you'll like it.
(And as an aside, avoid all Lean Cuisines, Smart Ones, etc, like the plague!).


Ingredients 

For the salisbury steak:

1 lb. ground grass-fed beef
2 shallots, very finely minced
1 egg yolk, beaten
1/2 teaspoon unrefined sea salt
1/2 teaspoon freshly ground black pepper
2 tablespoons butter

For the mushroom and onion reduction sauce:

2 cups homemade (or organic store bought) beef stock
2 cups dry red wine
2 sprigs fresh thyme
1/4 cup butter, divided
3/4 lb mushrooms (white button, oysters, shiitakes), chopped coarsely

I used white button but a more exotic variety would be fun

1 large yellow onion, peeled and sliced thinly


Directions
Combine ground beef and minced shallots together in a bowl and stir to mix together. Fold in beaten egg, salt and pepper. Continue stirring until the mixture is thoroughly combined.  Form the seasoned meat into four patties and set aside while you prepare the mushroom and onion reduction sauce.

Bring beef stock, red wine and fresh thyme to boil over a medium high heat. Continue simmering until reduced by half to three-quarters. 

Melt two tablespoons (or less) of butter in a skillet over a medium heat. When the butter is frothy, but not yet browned:


toss in onions and fry until they release their fragrance and their edges begin to caramelize. Remove the onions from the pan, and add the mushrooms. Continue sautéeing the mushrooms until fragrant and brown. Remove from pan and set aside.

Melt two more tablespoons (or less) of butter in the skillet and add the beef patties to the hot pan, searing on both sides until nice and brown on the outside but still pink in the center. Smother with sautéed mushrooms and onions.

Pardon the steam in this picture. 
You can imagine how good your house will smell!

Once the wine and beef stock are reduced by half to three-quarters, remove and discard the sprigs of thyme. Whisk in two tablespoons butter and continue simmering for one to two minutes.  (You can use less butter here if you want to)

Pour the reduction sauce over the Salisbury steaks, mushrooms and onions. Continue to simmer over medium heat until the steaks are cooked through.

Serve hot, with sauce.


Creamy Pasta with Roasted Zucchini, Almonds, and Basil


Y'all might have noticed that a lot of the recipes I post come from this blog.  Hers is one of the blogs I check regularly because I don't think she's ever posted a recipe that didn't look delish.  Not all of her recipes can be adapted to meet the real food guidelines, but many of them can.  Funny thing is, my tastebuds have changed so now I don't want the things that can't be adapted.  I know, I know, I've come a long way from the little girl who was going to raise a garden of snacks and desserts. 

I found this recipe on her blog as well.  I decided to try it because I have a lot of squash and zucchini from our CSA.  I didn't really feel super excited about it, but I didn't not feel excited about it either.  Well, let me just tell you, you should feel super excited about it.  The lemon and basil is perfectly light and summery.  And the roasted zucchini is a perfect addition. 

Be careful to chop up zucchini, though, and not cucumber like my hubs did.  Bless his heart.  Thank goodness he realized his mistake before we got any farther in the process, so we rectified the situation!  Be honest, though, can you really tell which one this is:


I'll never tell.  I will tell you this, though.  This pasta was so good that I decided I needed to take it for lunch the next day.  I had all the ingredients on hand except the zucchini.  No biggie.  I used squash instead, since zucchini is in the squash family.  Turns out reamy pasta with roasted squash, almonds, and basil is as good as creamy pasta with roasted zucchini, almonds, and basil.  (Ok, ok, I actually liked it better with zucchini, but it's really good with squash, too).

Ingredients

2 medium zucchini, cut into 1/2-inch cubes (about 3 cups)
1 1/2 tablespoons grapeseed oil
3/4 teaspoon kosher salt
Pepper, to taste
2 tablespoons raw slivered almonds
1/3 cup heavy cream (raw or lightly pasteurized)
1 sprig basil, with leaves and stem
3 tablespoons goat cheese (lightly pasteurized)
1/2 teaspoon finely grated lemon zest
6 ounces whole-wheat spaghetti or linguine

Directions

Heat oven to 500 degrees. Toss the zucchini and oil with 1/2 teaspoon salt and pepper to taste.  Arrange zucchini on a baking sheet in a single layer. Roast, tossing occasionally, until golden and tender, 20 to 30 minutes.


Meanwhile, toast the almonds in a skillet over medium heat until golden, 3 to 4 minutes. Transfer to a small bowl.

Simmer the cream and basil  in a small saucepan over medium heat until reduced to 1/4 cup, about 7 minutes.


Whisk in the goat cheese until the sauce is smooth. Remove from heat; stir in lemon zest and 1/4 teaspoon salt. Cover and keep warm. Meanwhile, bring a large pot of water to a boil. Cook the pasta according to the package directions. Drain well. Toss the pasta with the cream sauce. Serve topped with the zucchini and almonds.


(Recipe from The New York Times)


Chocolate Tart with Hazlenut Crust


When I was growing up, my mother was very health conscious.  She learned it from my grandmother who was also very health conscious.  My grandmother was "organic" way before it was cool.  I mean, she ordered a magazine specifically so she could teach herself yoga in the 60's, way before yoga was trendy.  What I wouldn't give to have Meemaw around now to pick her brain!

So my mother learned from her mother and as a result, we ate whole wheat everything.  For breakfast we sat down as a family every morning for homecooked eggs, grits, toast (whole wheat, naturally), etc.  The menu varied, but it was always healthy and always homemade.  My point?  It was always a big deal on our birthdays when we got to pick out a box of . . . wait for it . . . sweet Cereal!  On our birthday any kind of cereal was fair game.  Fruit Loops.  Fruity Pebbles.  Anything.  Once a year.  I still vividly rememer the year I picked out:

Photo from here
Y'all. Chocolate chip cookies in a bowl with milk? For breakfast?  My 10-year-old dreams had all come true! 

It's probably a good thing we only had birthdays once a year.  (And it's also a good thing I had four sisters so one box of sweet cereal really translated into about 2 days' worth of chocolate chip cookies for breakfast.)  With seven birthdays to celebrate throughout the year in one family, my mother had to be creative about how to make our birthdays special to us.  Forget a birthday party.  Birthday parties were secondary to a box of sweet cereal.  We loved it.  And to this day I'm a birthday person. 

Birthdays are a huge deal to me.  (The hubs, bless his heart, has learned how important a birthday is to me and this year he gave me a present, albeit a small one, every day for the week of my birthday.  Pretty sure I win the husband contest.  But yes, all of you out there reading this can print this post and accidentally leave it sitting around your house.).

My birthday is on July 5.  July 5 is one day after July 4.  Obviously.  It's also six days after my mother's birthday.  My parents live about 30 minutes away from me, and this year one of my sisters was in town for my birthday (and 4th of July and my mother's birthday) with her husband and six children, as were my uncle and his family.  So we had a big weekend with lots of celebrating.  I was on tap for the dessert and I knew it had to be something really good. 

Let me just tell you.  This dessert is just that.  Really, really good.  Maybe even better than a box of sweet cereal. 

Ingredients

For the crust
1 1/4 cups hazelnuts
1/4 cup whole wheat flour
1/4 cup coconut oil
pinch of salt
1 teaspoon vanilla

For the filling
1 1/4 cups coconut milk (I didn't have enough coconut milk on hand so I used half coconut milk and half cream)
9 ounces (about 1 3/4 cup) dark chocolate, chopped
2 eggs at room temperature
1 teaspoon vanilla
1/4 teaspoon salt

For the chocolate glaze
1/2 cup bittersweet chocolate, chopped
2 tablespoons coconut milk 

Directions

For the crust
Preheat the oven to 350˚F. Place the hazelnuts on a baking sheet and roast for about 10-15 minutes, until fragrant and lightly toasted.


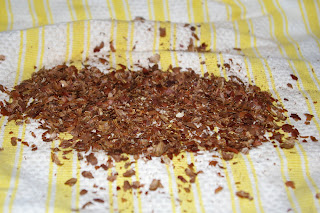
Remove from the oven and allow to cool wrapped up in a clean towel for about five minutes. Shake the towel to help remove the hazelnut skins.  Your towel will likely look like this after you're finished, so plan on doing laundry.


Don't worry if some of the skin stays on the nuts.  No biggie.  Place the hazelnuts, flour, coconut oil, salt, and vanilla in a food processor. Pulse until the hazelnuts become finely ground and everything is combined. (Be cafeful not to mix until smooth or you will end up with nut butter: slightly coarse is better.)


Place the hazelnut mixture in a 9-inch tart pan with a removable bottom. (Note:  I didn't have a tart pan so I improvised with a spring form pan, which worked fine).  Press evenly across the bottom and about one inch up the sides of the pan. Place in the oven and bake until firm, about 10 minutes. Allow to cool on a wire rack.


For the filling
Place the chocolate in a large bowl and set aside.


Heat the coconut milk in a small saucepan over low to medium heat and bring to a boil. Remove from the heat and pour over the chocolate. Let sit for about 5 minutes until the chocolate has melted, then stir until smooth.

Meanwhile whisk together the eggs, vanilla and salt. Slowly pour, while whisking, into the chocolate mixture.  Pour the chocolate mixture into prepared crust.


Bake until the filling is set 3 inches in from the edge and the center is still wobbly, about 20-25 minutes. It will puff up slightly, but once cool it will recede. Allow to cool completely before adding the glaze to the top.

For the chocolate glaze
Place the chocolate and coconut milk over a double boiler and heat until melted. Pour the glaze over the cooled tart and garnish with extra chopped hazelnuts or chocolate curls.


Serve at room temperature or chilled.